


*This publish has been up to date with newer photographs, as a result of vegetation take their merry previous time rising, and it’s much more enjoyable when there are updates*
We snuck in a enjoyable little mission that I’ve been dying to attempt for, oh 10 years now. Behold: our DIY wire vine diamond trellis.
We’ve wished to attempt our hand at one for some time. Really the primary time I assumed “yeah, I would like that” was again in 2009 after I noticed one on the surface of this home that we crashed (sure, that’s 10 years in the past! Regardless that 1999 feels like 10 years in the past in my head). I want we had captured an image of it for that publish, however there was blotchy daylight on it so it didn’t make the ultimate lower. However that household nonetheless lives in that home, that diamond trellis continues to thrive, and I proceed to gasp at it each time we stroll by.
Which is how you find yourself posing in entrance of your personal DIY diamond trellis like this. It’s a slippery slope.
The Diamond Trellis Urge (let’s capitalize it as a result of it has grown right into a legit situation for me through the years) acquired even stronger after we painted our home white final fall. It’s simply such an ideal clean canvas for some lush flowering vines. You might have even seen a few spectacularly unhealthy renderings of me drawing a diamond trellis on the large white wall on the precise of this photograph final 12 months on my InstaStories.

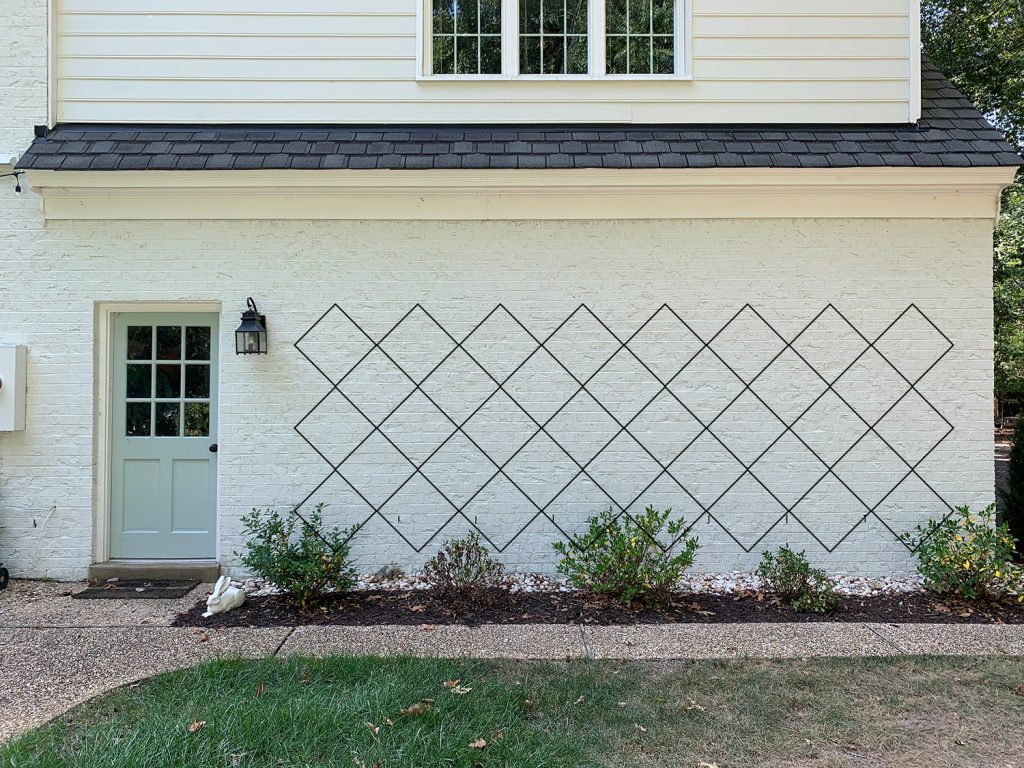
And now that sturdy whole-body craving has been glad… as a result of MOMMA HAS A DIAMOND TRELLIS.
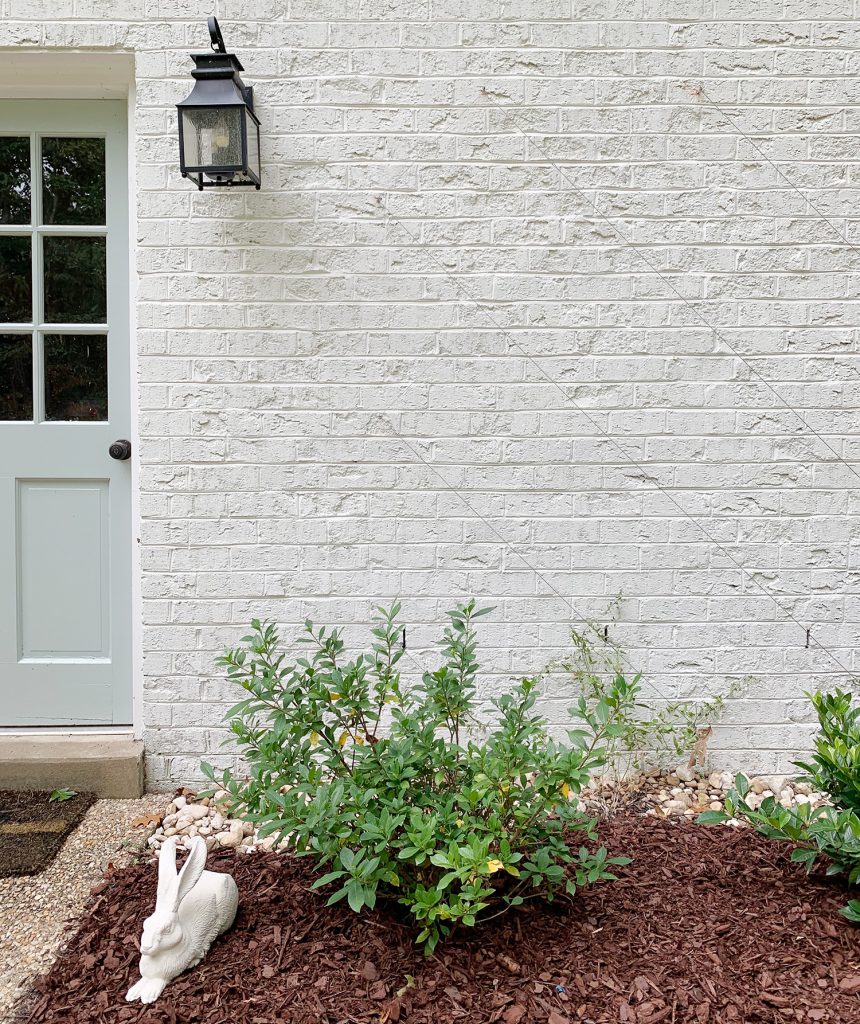
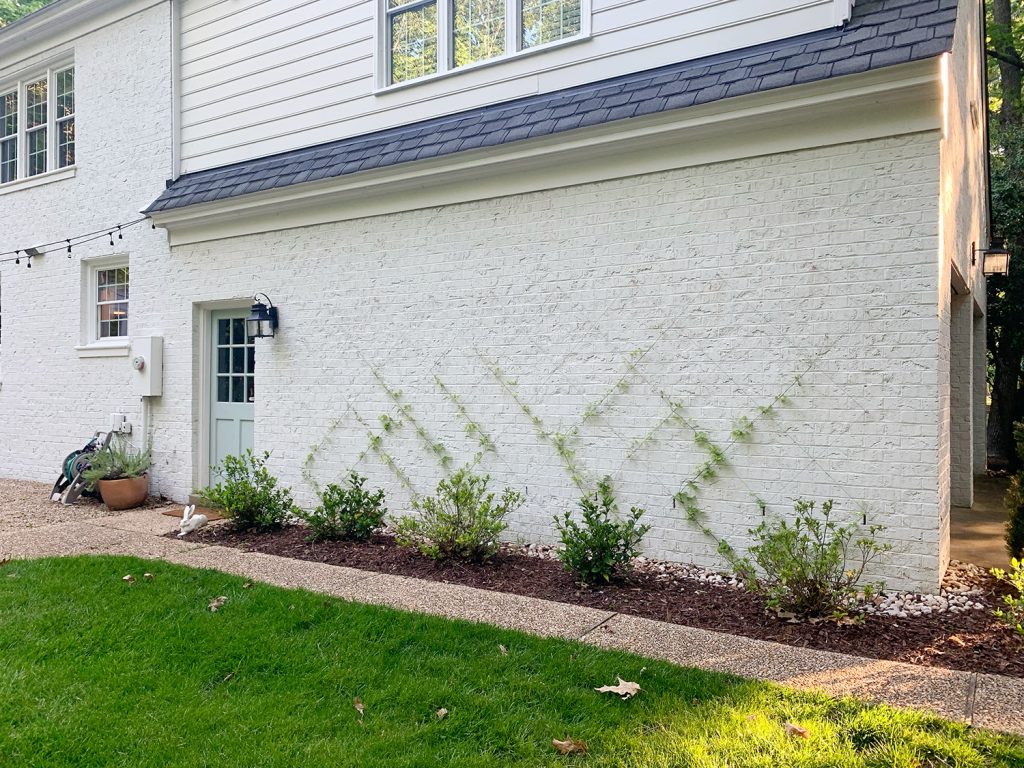
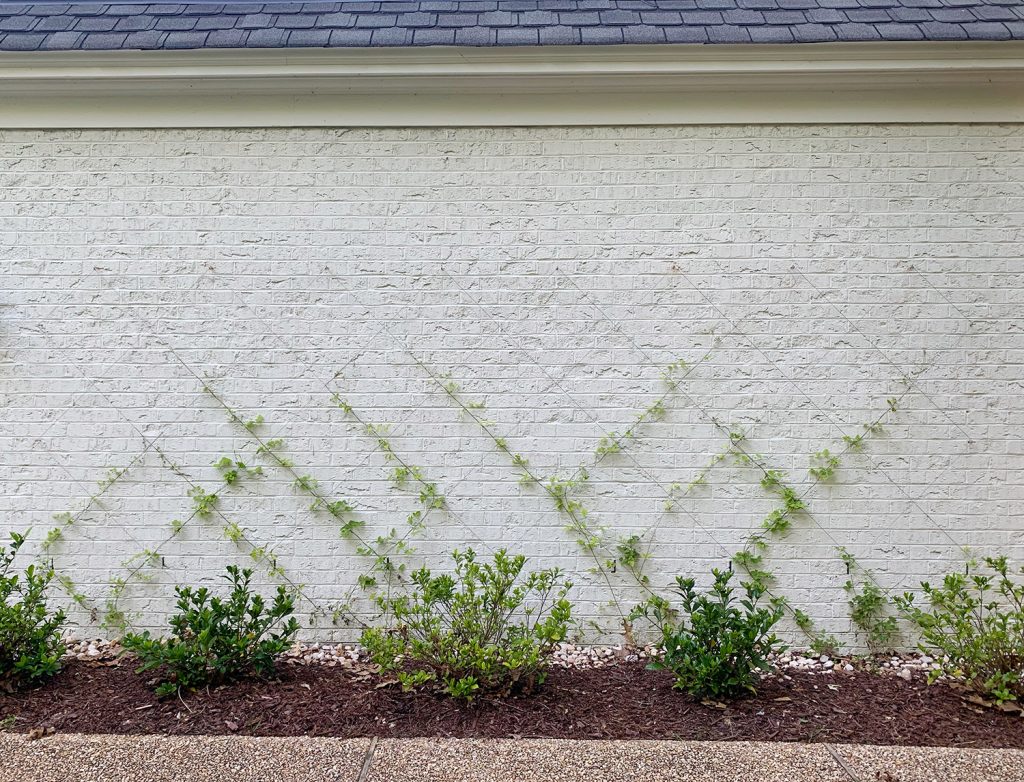
I do know, I do know, it’s important to squint to even see it in that photograph above. However because of the magic of up to date footage, right here’s what it regarded like 6 months later. I snapped these up to date photographs proper earlier than we moved to Florida (extra on that right here and right here).
Right here’s one other extra up to date shot from a wider perspective to your viewing pleasure:
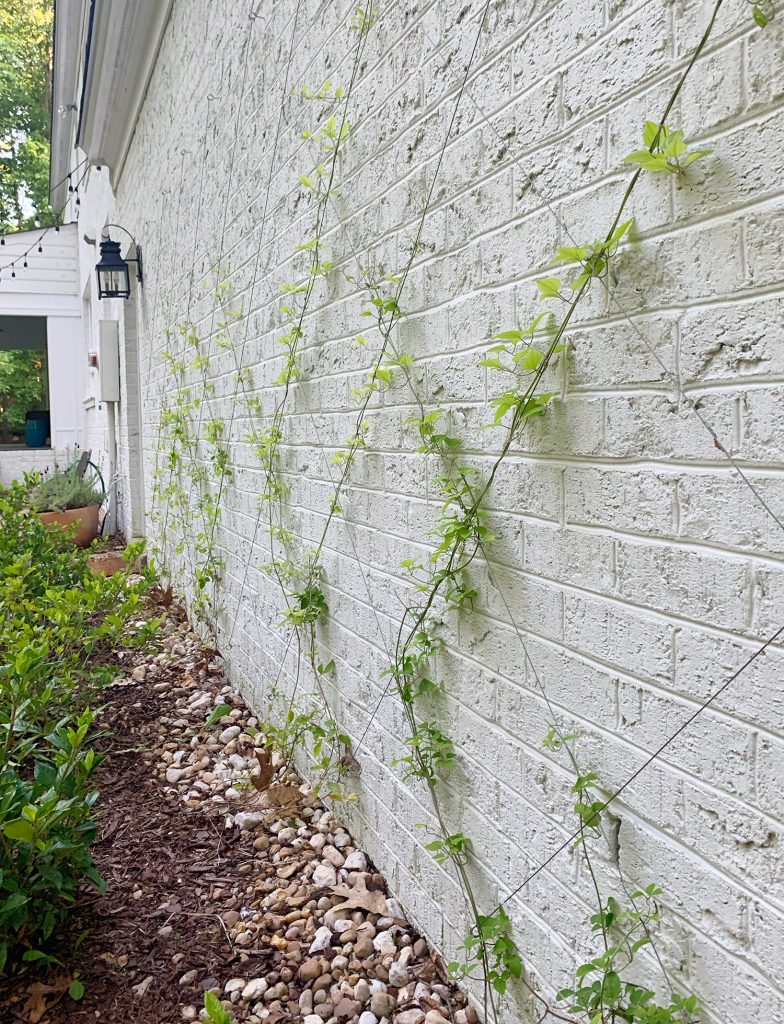
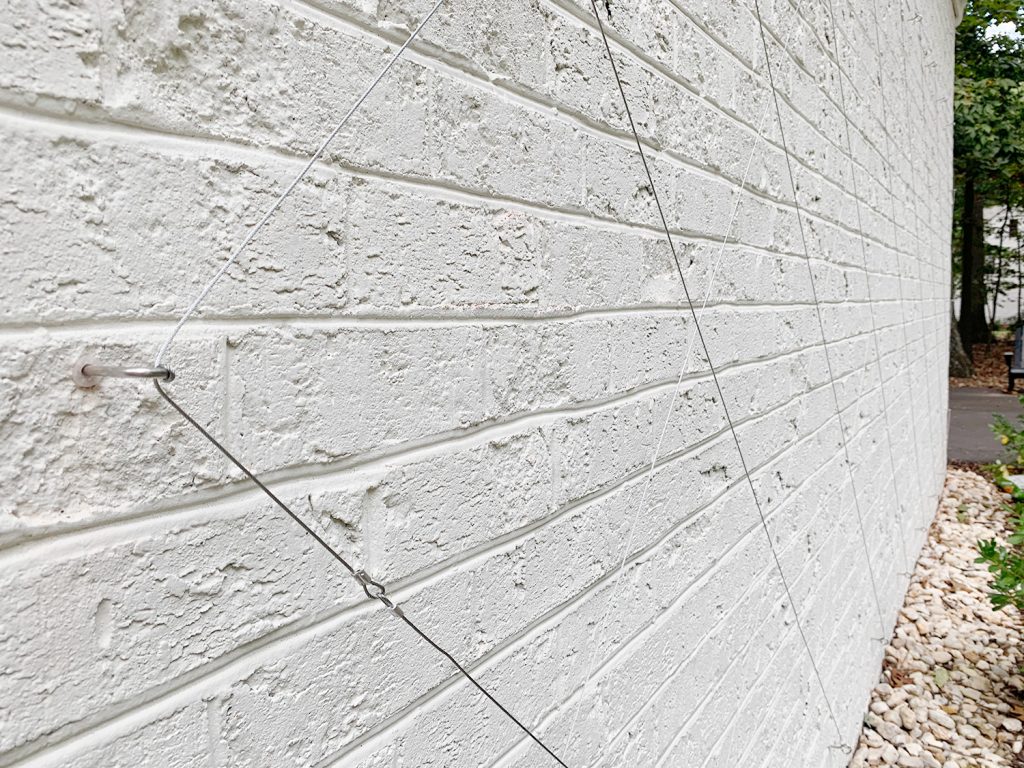
And right here it’s from the facet so you possibly can actually see the diamond-shaped wire trellis that we created:
They promote some kits for putting in them (like this one and this one) however we determined to purchase the items ourselves a la cart (that was dumb, simply purchase the $13 package – or two when you want extra wire). You’ll additionally want a couple of primary instruments (we added asterisks subsequent to those which can be required for brick in case you’ve got the identical setup that we do).
Supplies & Instruments
*Reminder: these are gadgets we would have liked as a result of we had been putting in a trellis on brick. When you’ve got another sort of siding, it’s possible you’ll not want a few of these. Like, an everyday drill and drill bits ought to work simply positive.
Planning Your Wire Trellis
The very first step for us was to determine what we wished our vine trellis to appear like. I snapped an image of the area and dragged it into photoshop so we might play with the dimensions, measurement, and placement of the trellis. That is one thing it’s also possible to work out on paper when you don’t have the precise software program (heck, you possibly can print out a photograph and sketch proper onto it with pencil), however I extremely suggest some type of “planning” step like this earlier than you begin making holes. We did this rendering first, and fairly rapidly decided the dimensions felt too giant for our liking (simply two diamonds tall felt kinda piddly…).
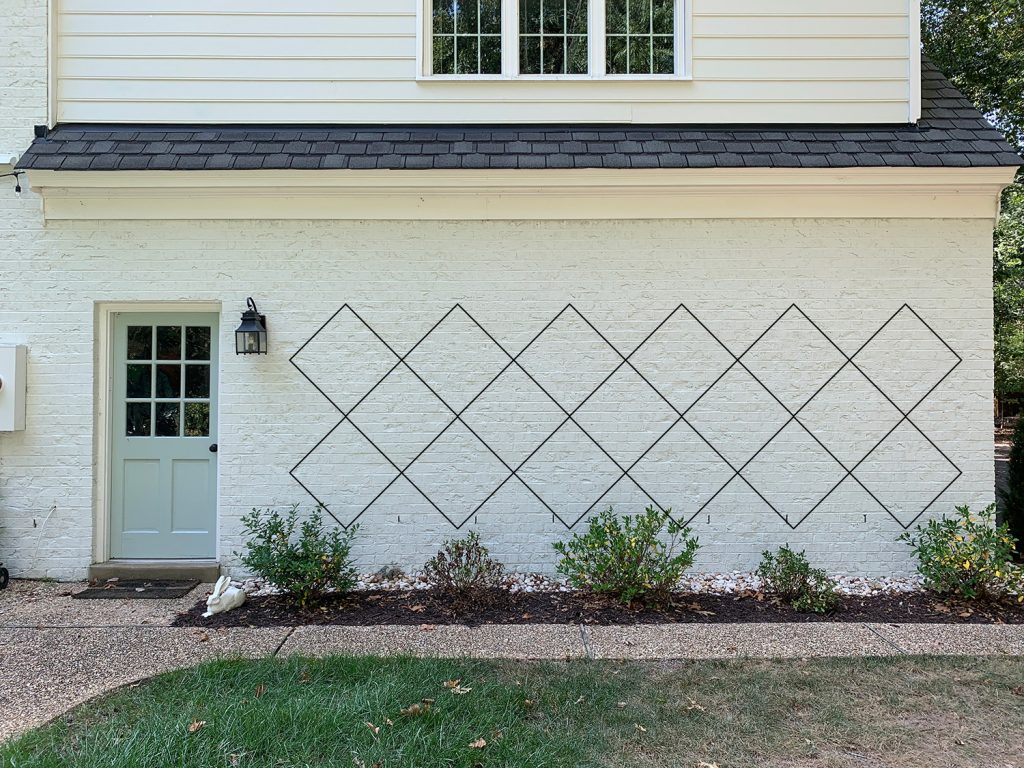
We additionally thought of “open” diamonds on the facet, however we each agreed it regarded an excessive amount of like an argyle sweater and the “closed” diamond shapes regarded higher on the ends.
Our last design ended up being a smaller model of the primary one we tried. Because of this planning course of, we had been ready to ensure it regarded centered on the wall whereas additionally staying visually in keeping with different parts, just like the door. It additionally helped us plan how a lot materials we would want.
Map Out Your Sample In Actual Life
Transferring our digital mockup onto the bodily wall was most likely probably the most brain-intensive portion of this mission. I wouldn’t even name it arduous, it simply required some focus and double checking. We used some reference factors in our photographs to find out the place we wished our sample to start out on the wall and, by means of just a little little bit of trial & error, we discovered the exact measurements for every of our diamonds (ours are 25″ aside). If I had been doing it once more, I might’ve included a tape measure or yardstick in my unique photograph earlier than photoshopping, that approach we might use that for scale – but it surely labored out simply positive with out that reference level.

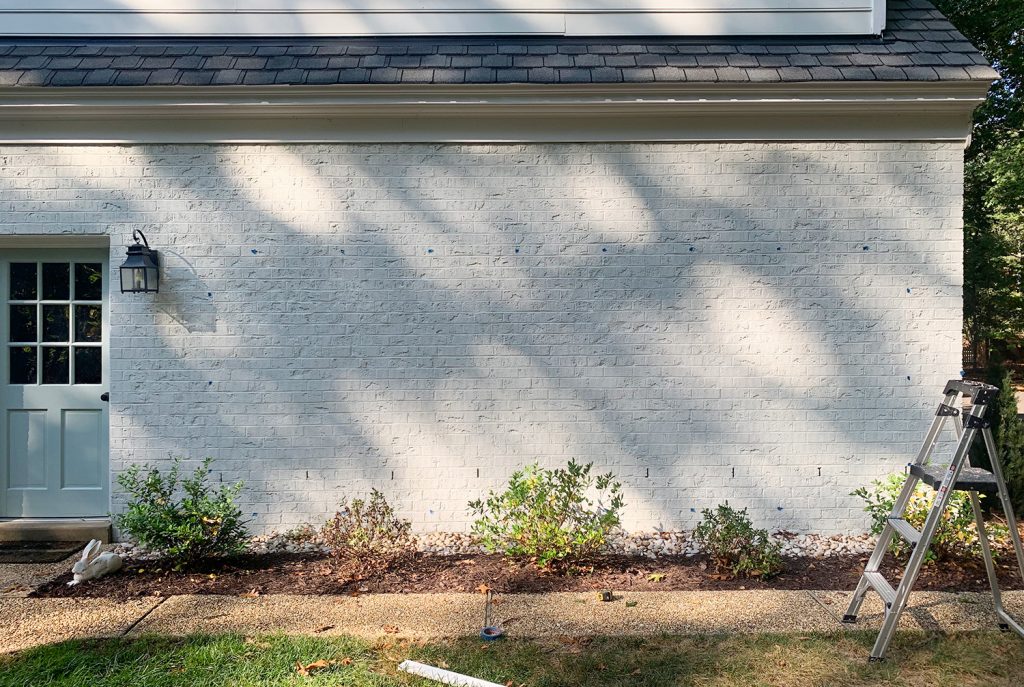
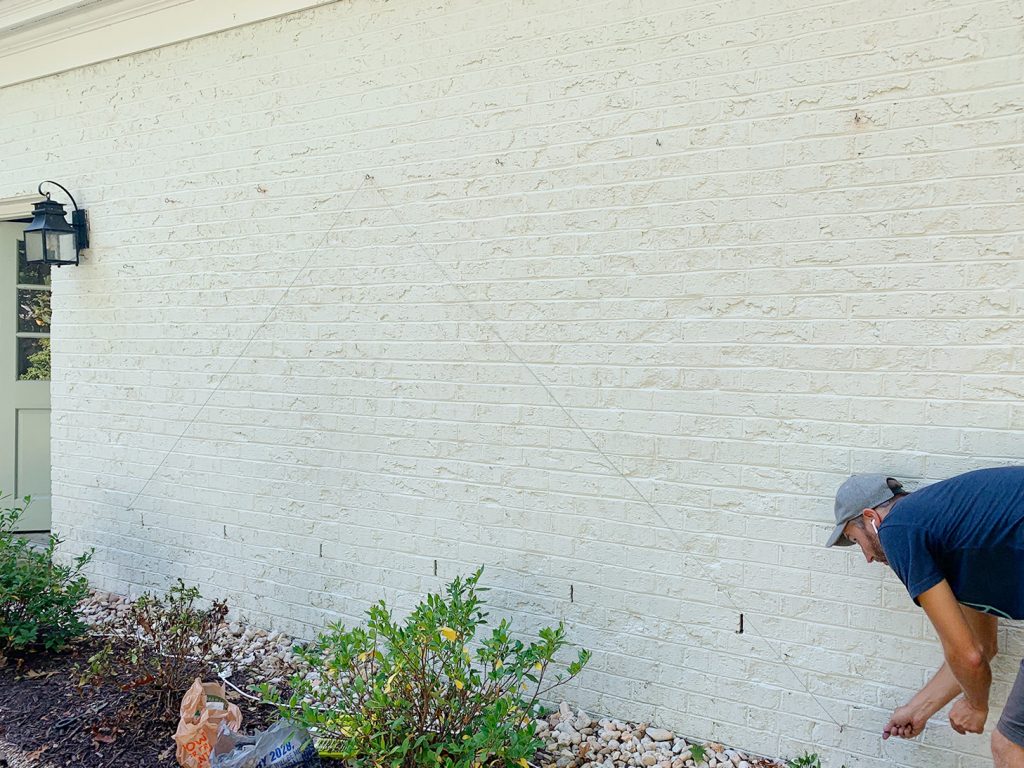
Because it was vital for our last sample that every one of our anchor factors had been equally spaced and completely stage, we marked every anchor level with a small piece of painter’s tape and a marker dot. We didn’t need to write instantly onto the brick, particularly as we had been fine-tuned the position of all the things.
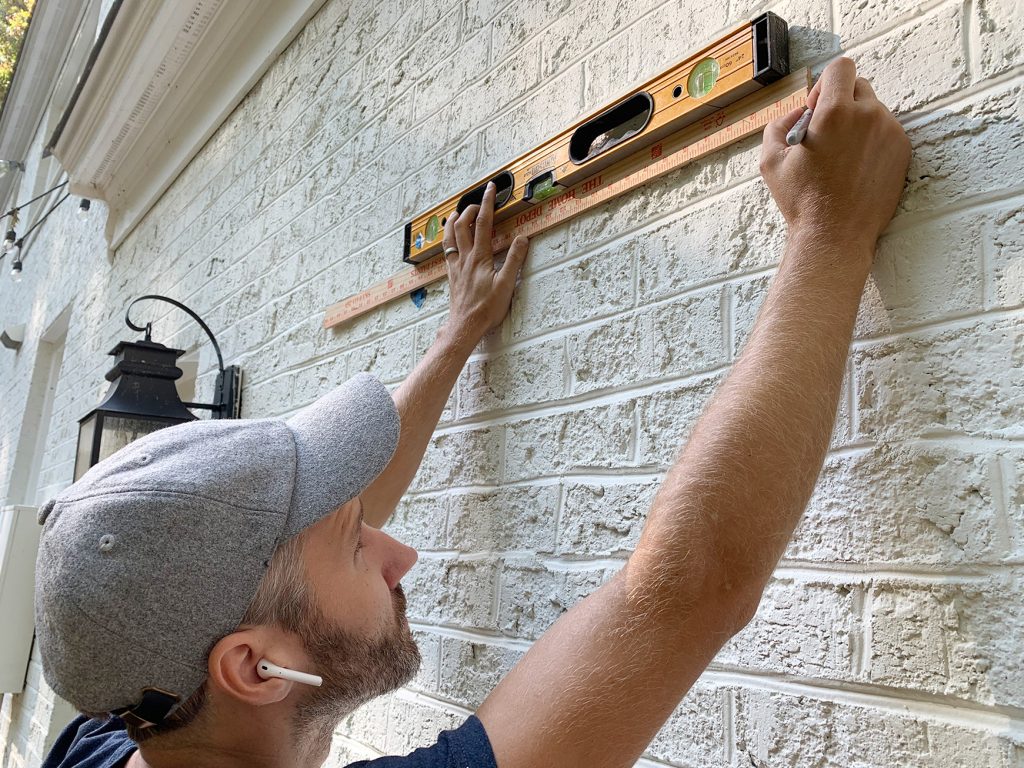
After you mark out your entire drilling spots with tape and a marker dot, it’s time to double and triple examine your measurements earlier than you drill something. THIS IS IMPORTANT. Don’t skip this step. It’s a lot simpler to maneuver items of tape than to drill new holes and transfer all the things since you acquired it fallacious. We even broke out a protracted piece of scrap wooden to ensure our high marks had been precisely plumb with the underside holes (ignore these small vertical notches in our brick alongside the underside that correlate with nothing, these are some type of storage air flow factor and aren’t tape marks – our blue tape marks are nearer to the bottom and proper below the dots that we taped out alongside the highest).
Putting in Your Anchor Factors
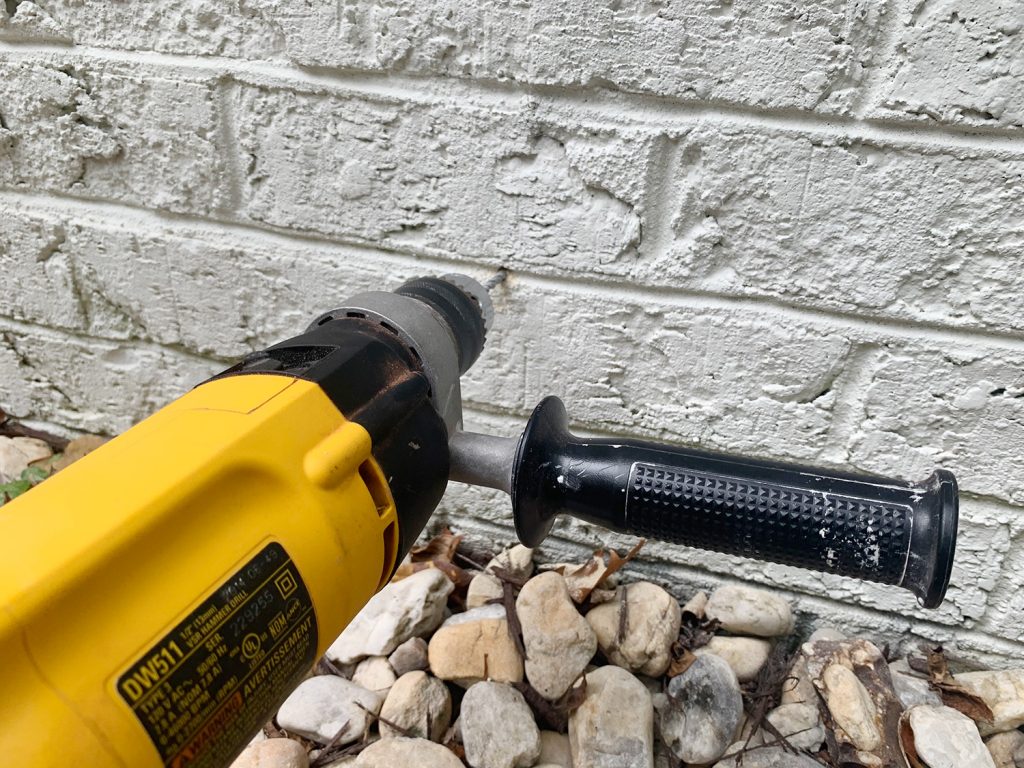
As soon as your spots are marked, you will get to drilling. Since we had been drilling into brick, we used our hammer drill with a small masonry bit to make shallow holes by means of every of our tape marks, simply to make a extra everlasting mark on the wall earlier than any tape fell or blew off.
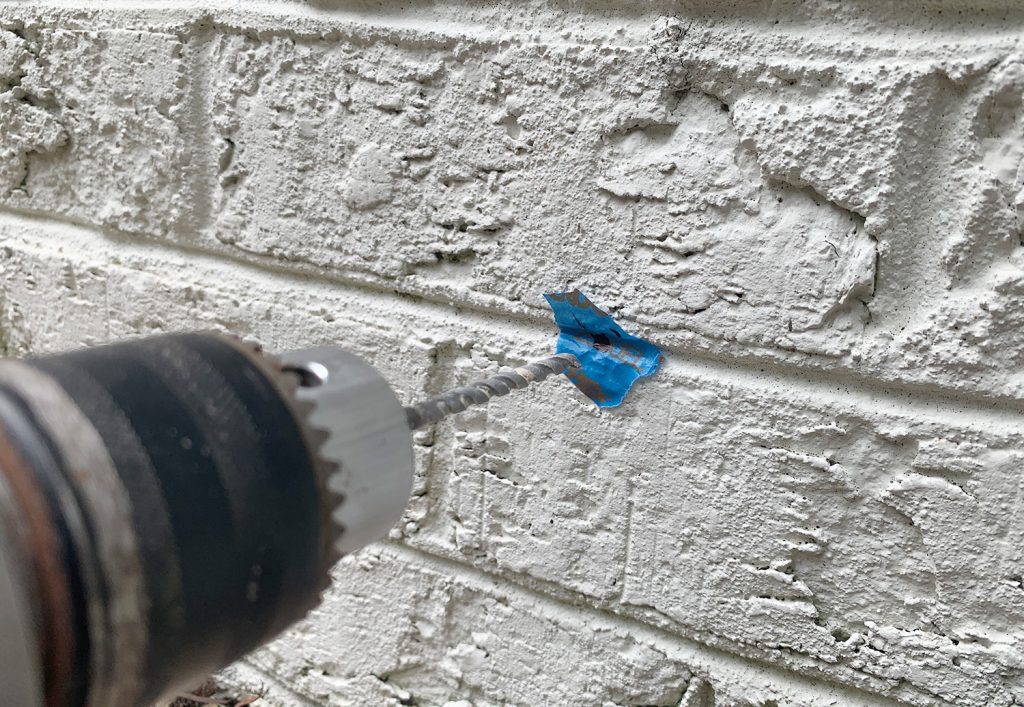
Then we went again round with an even bigger bit to drill a bigger and deeper gap to slide the anchors into. A hammer drill makes these simpler as a result of along with the spinning movement of an everyday drill, it additionally pulses or “hammers” on the similar time to chip away at supplies like brick, concrete, or block.
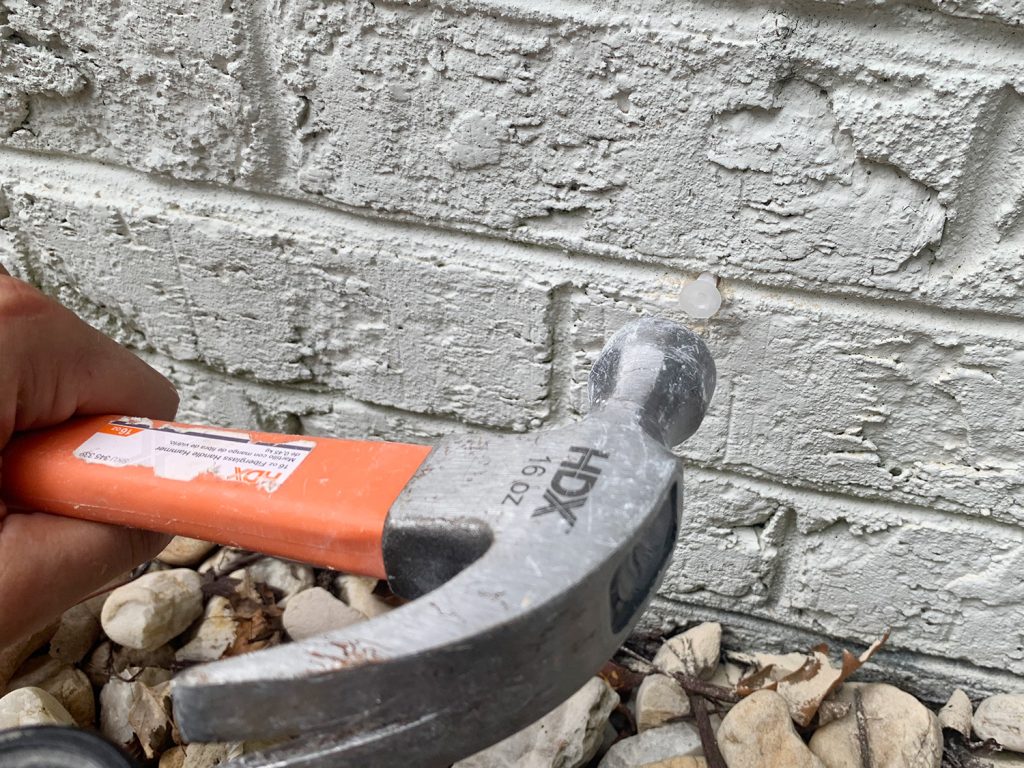
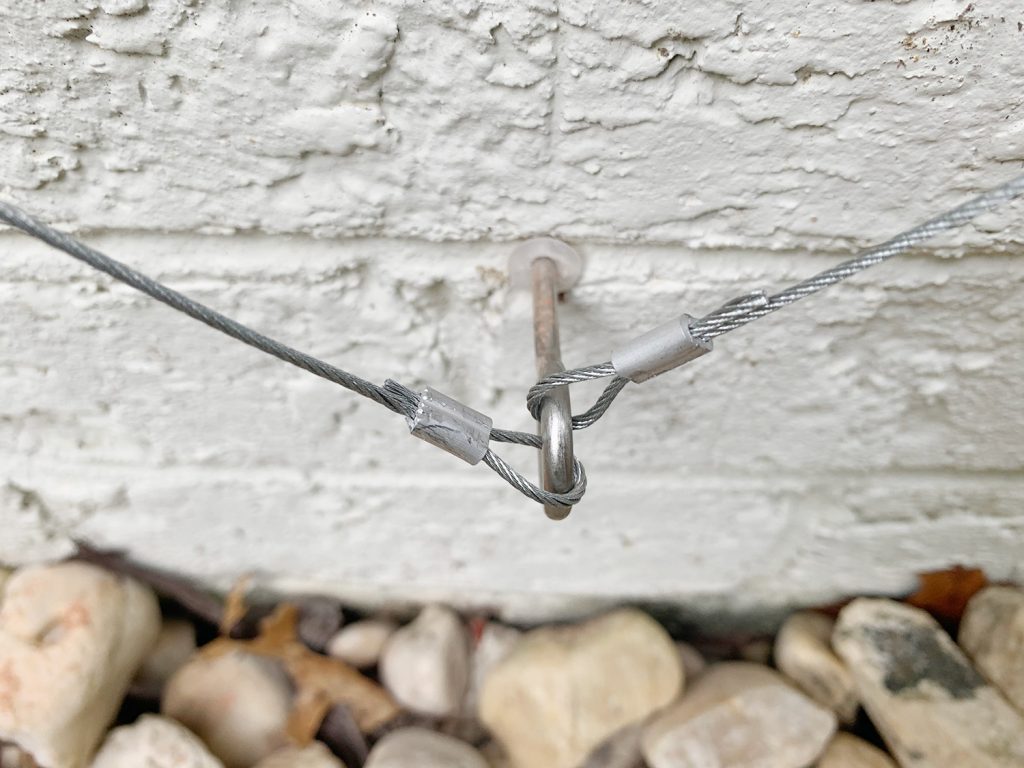
As soon as all of our holes had been made, we went round and tapped in some plastic anchors designed for concrete and brick with a hammer. Sometimes I might use one thing like a Tapcon screw to screw one thing into brick, however on this case we would have liked one thing that may work with the screw eye hooks and these did the trick.
Then we went round and screwed in our eye hooks. I had bother discovering ones that (1) caught out from the wall considerably and (2) weren’t huge, however these 3″ puppies did the trick. The small measurement is useful as a result of it helps them visually disappear (I would like your eyeballs to soak up the stunning vines, not the metallic hooks) and the lengthy size will assist separate our trellis from the again wall – so our plant has loads of room to develop and wrap across the wire on each side.
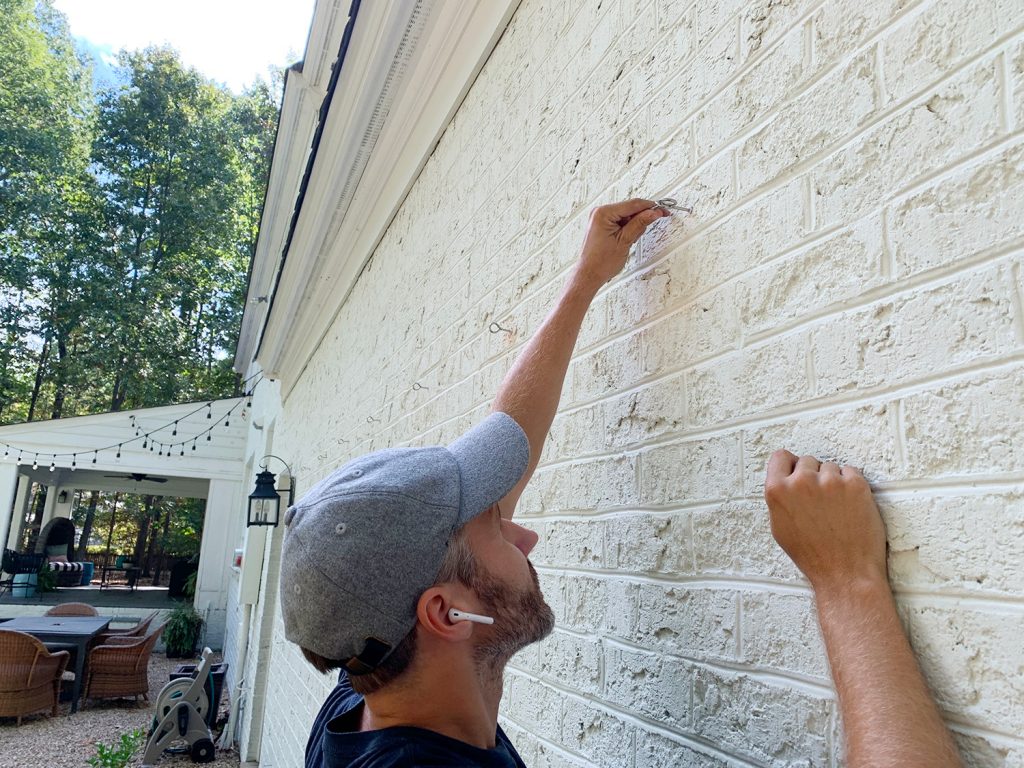
They had been simple handy tighten into the anchor at first, and in the direction of the tip we relied on a spare drill bit to present us a bit extra leverage for the previous couple of spins. These suckers are in there.
Stringing Your Wire
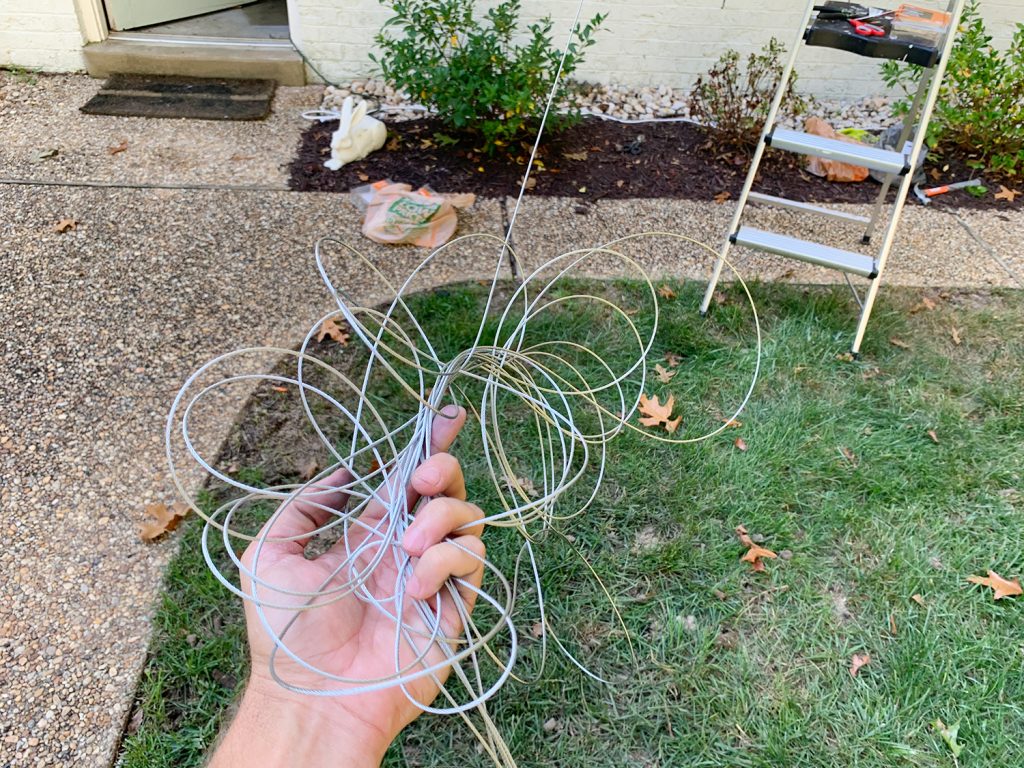
We had been utilizing this 1/sixteenth galvanized metal wire rope for our trellis. We had no clue how a lot we’d want so slightly than purchase one lengthy uninterrupted reel from the shop, we purchased a number of 50ft packs so we might extra simply return any unused materials. I extremely suggest opening and unwinding them totally earlier than you begin attaching them, since ours usually got here out in a tangled mess.
I’ll present you in a minute how we secured the tip of the primary wire to start out the sample, however this entire course of is fairly easy. It’s simply mainly looping the wire by means of the sample – up and down, facet to facet – ensuring you’re going to the right subsequent eye hook. We messed this up as soon as and began to create a wonky diamond, but it surely was simple sufficient to repair as quickly as we observed our mistake. It’s actually like placing shoe laces right into a shoe. Nothing is everlasting and you’ll step again to ensure it seems proper.
We looped the wire by means of every eye hook twice as we went, as a result of that made it simpler to maintain the wire taut as we continued to string it by means of completely different eye hooks.
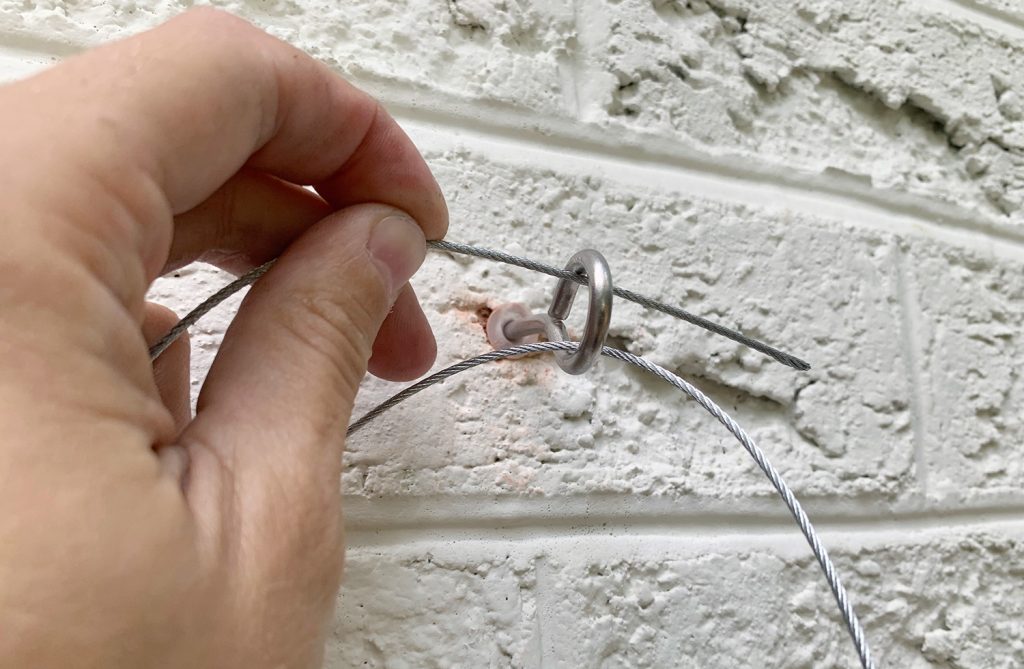
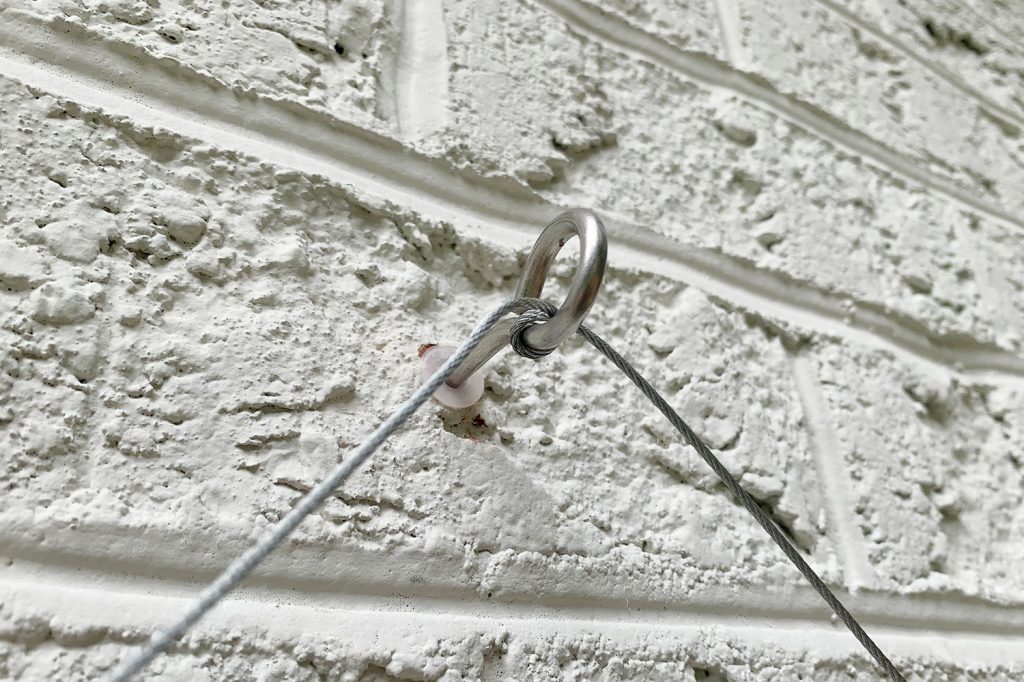
It mainly regarded like this as we went alongside. So it’s not tied in a knot, however the wire is stiff sufficient that it holds pretty properly with a good loop like this.
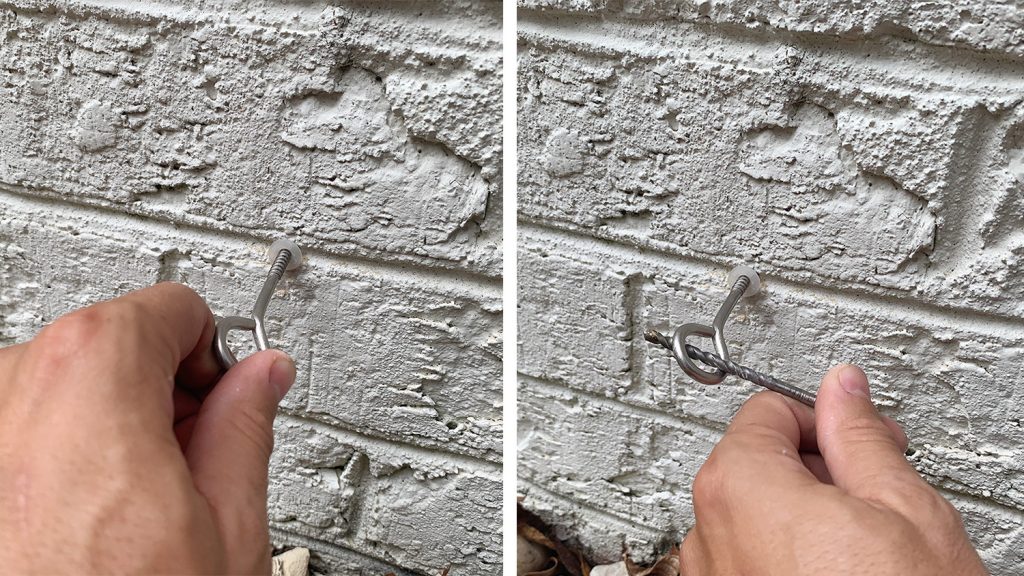
After we got here to the tip of 1 50ft size of wire, it got here time to attach a brand new strand. We hadn’t labored with these things earlier than, however we discovered these aluminum ferrules to be a reasonably easy method to accomplish this. They can help you make these loops on the finish of your wire by feeding it by means of one facet of the ferrule after which again by means of the opposite one.
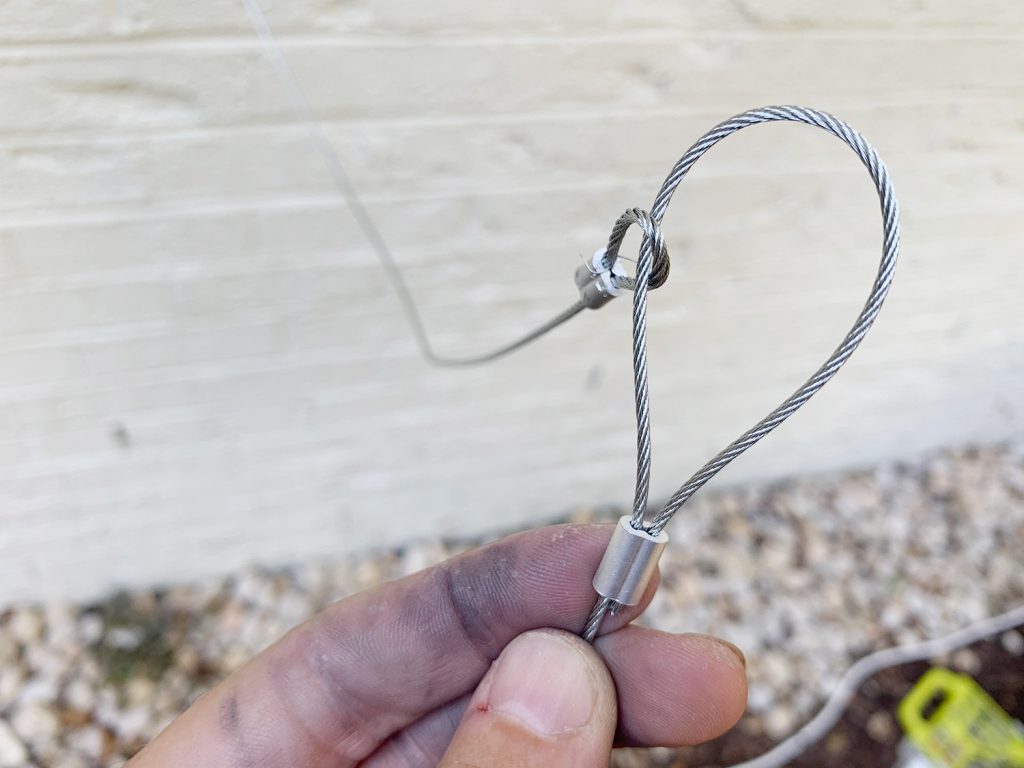
Then we simply used some pliers we had available (properly, electrical wire cutters, which had an important tip for this) to crimp the ends of the ferrule, which mainly crushed them sufficient to carry the wire in place for the lengthy haul. Making these small loops on the tip of every wire grew to become our go-to method to join them into one lengthy steady strand.
It’s additionally the approach we used to connect the beginning finish of our wire to the primary anchor level and (as soon as all the things was totally threaded and pulled taut) we made one other loop on the finish of the wire to do the identical factor.
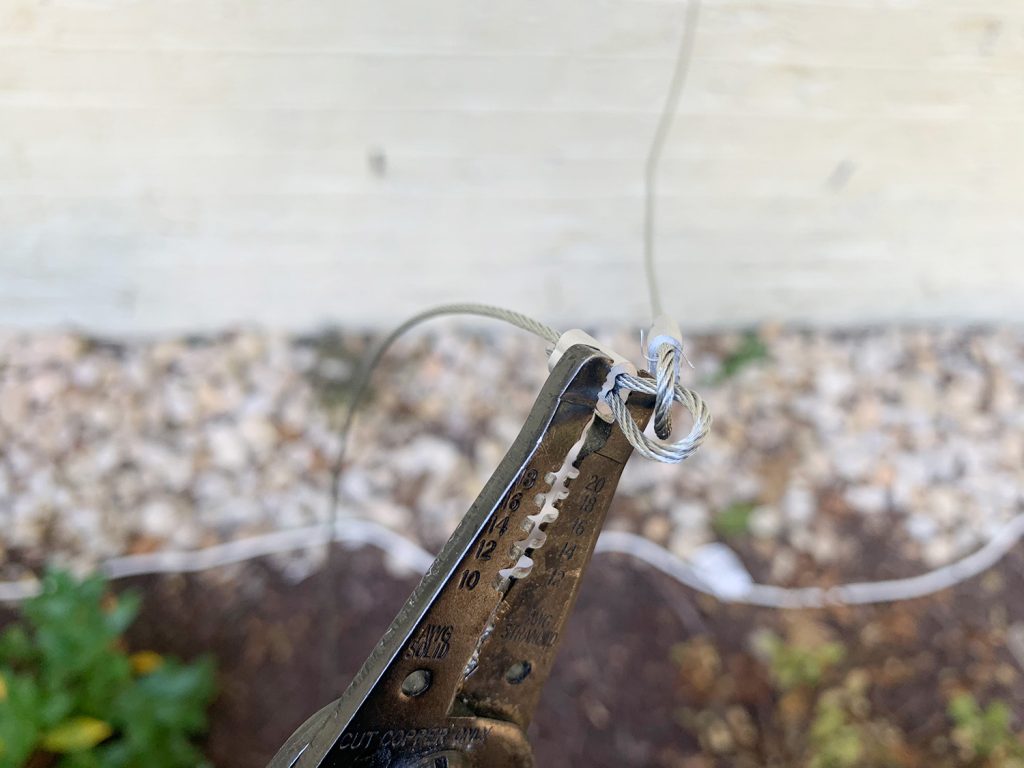
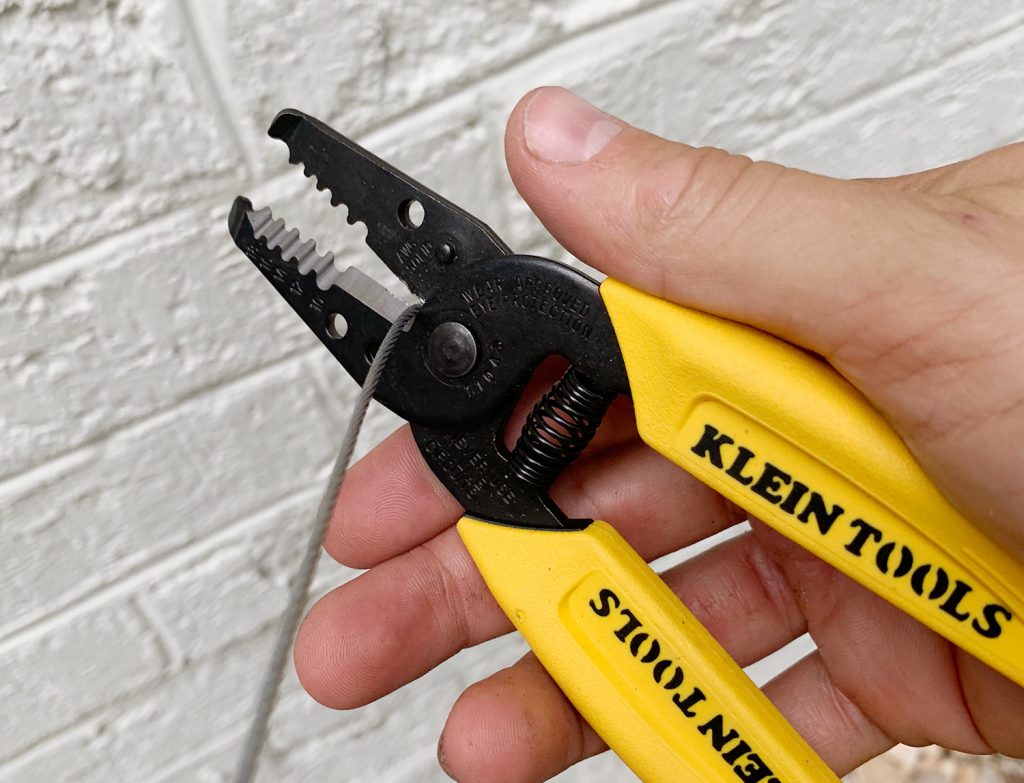
One tip for you is that to be able to thread the ferrule, you want to have a really clear lower on the tip of your wire. If it’s frayed it gained’t slide in and also you’ll stand there for 45 minutes making an attempt to get it in there (ask me how I do know). We really needed to go purchase a brand new pair of wire cutters for this mission as a result of our previous pair had grow to be sort of blunt and it was fraying and smashing the wire to the purpose the place it wouldn’t match into the ferrule. So save your self a few of that frustration and ensure your wire cutters are as much as snuff from the beginning.
A few of the kits include a turnbuckle that you need to use to tighten your wire for max sustained pressure. We opted to not do one for now only for simplicity’s sake, but when we discover ours changing into lose over time we might all the time add one OR simply attempt twisting a few of the eye hooks within the brick a bit tighter to taut issues up.
Including Your Vining Crops
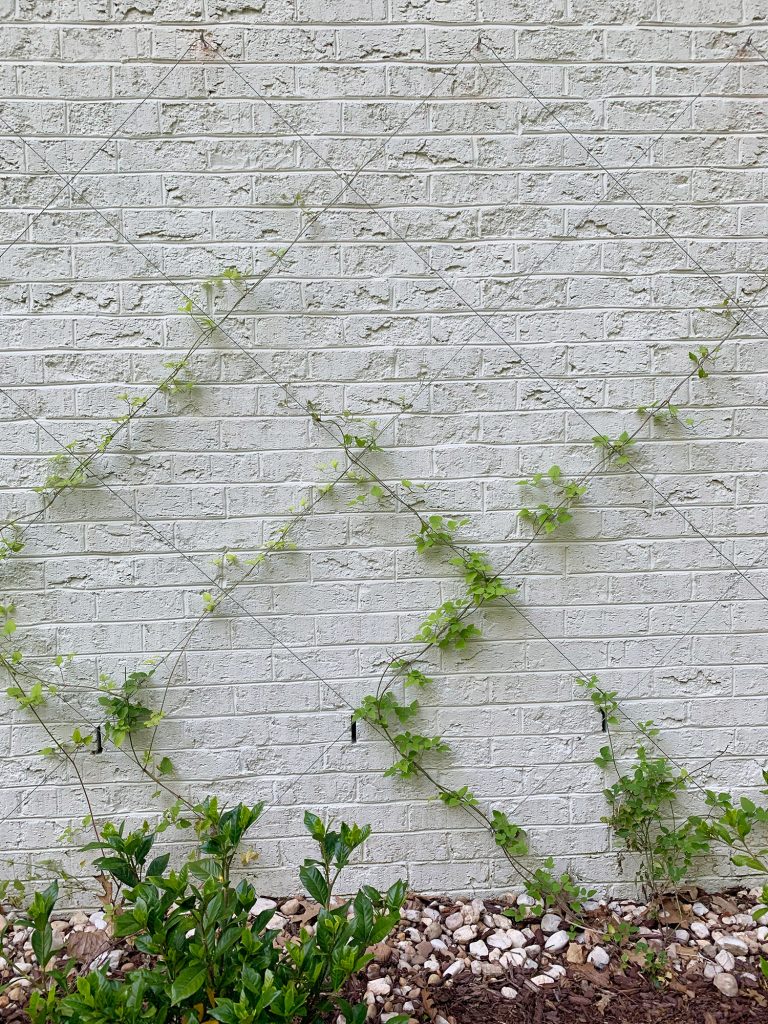
There are all type of choices for good vining vegetation for tasks like this – particularly relying in your location and situations (for instance we now have deer who like to eat all the things) so we spoke to 2 consultants at our native nursery they usually extremely really helpful clematis for our software because it’s a quick grower, it produces good flowers, deer don’t are inclined to eat it in our space, and it isn’t harmful to place close to our brick (some ivies are stated to be extra problematic in the event that they develop in your brick for a very long time).
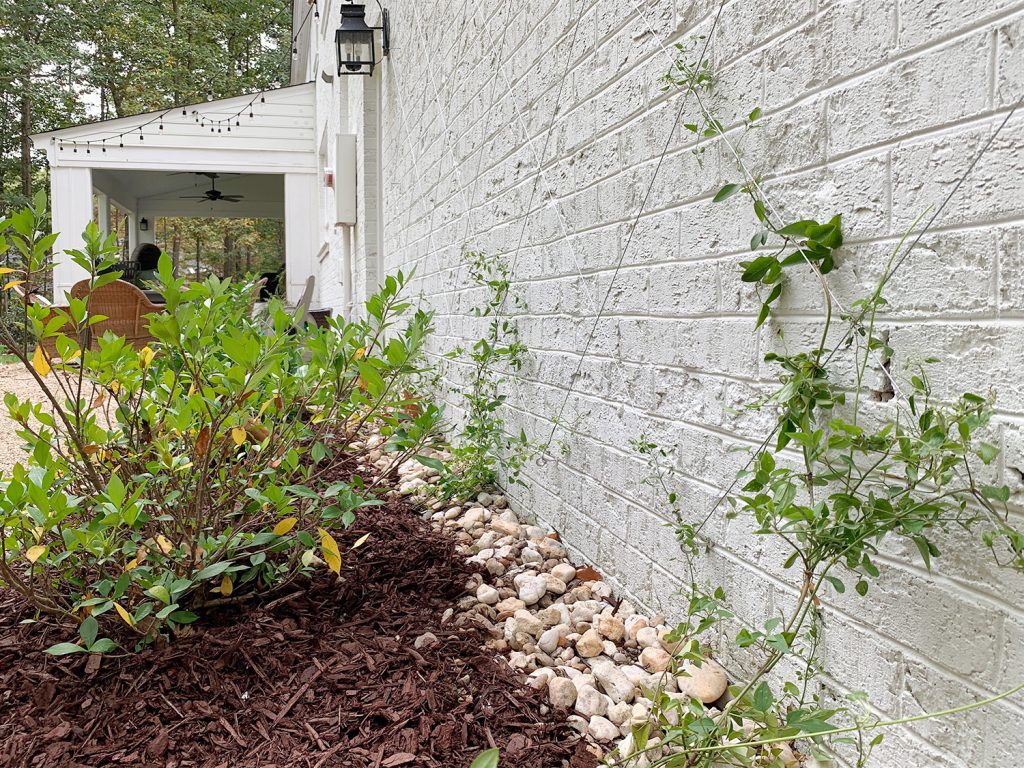
Our native nursery was working just a little low on stock so we grabbed what we might and had been in a position to plant 4 vines at strategic intervals alongside the underside fringe of our wire trellis. After delicately unwinding them from the trellis they got here with (every plant had just a little metallic trellis within the pot), we did our greatest to rigorously wrap them up and across the wire in all instructions.
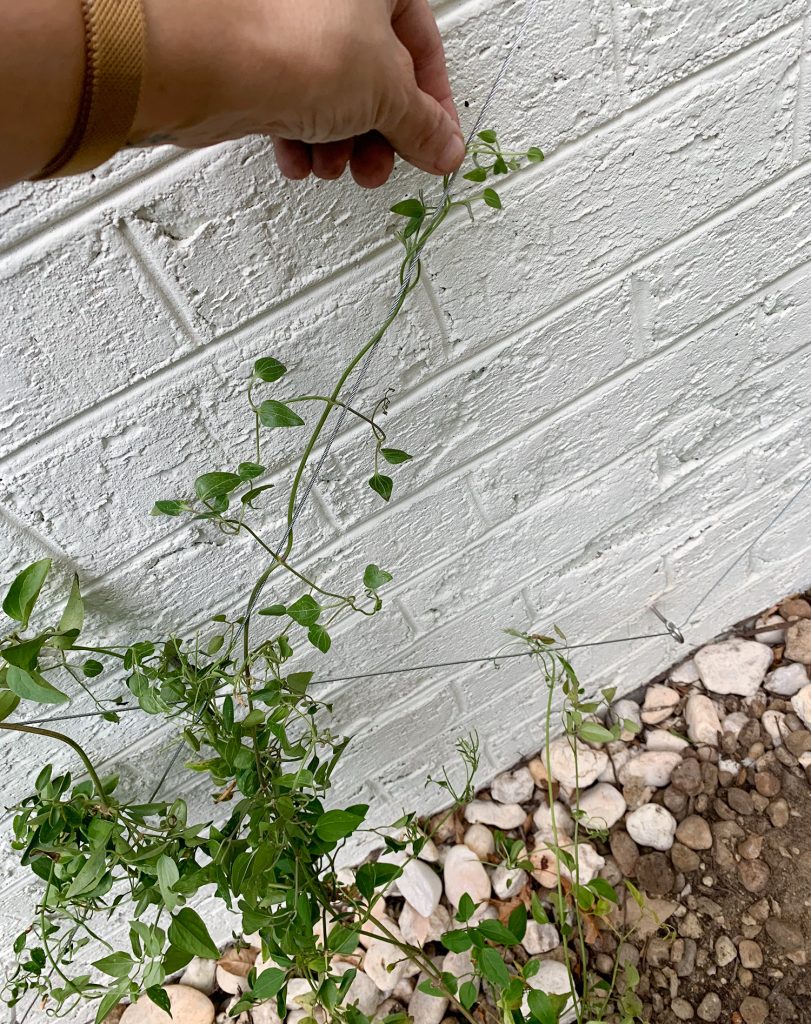
We do know that clematis is such a powerful grower that the diamond sample is one thing we’ll must proceed to coach them to carry onto over time. If we didn’t contact them once more they could simply cowl this complete wall with leafy vines and blooms, so we plan to control them to make them hug the trellis form over time. Replace: really over the following six months as they doubled and even tripled in measurement, they caught to the trellis and saved their form for probably the most half. In order that made it good and straightforward.
The final step of this mission was to mulch all the things, and water diligently for the following few months to ascertain them (it’s a superb time to whisper “you develop, woman” encouragements to the vines). We additionally changed a few dying vegetation within the mattress, which helps the entire backyard look good and luxurious.
So as soon as once more, right here’s a flash again to how issues regarded proper after we made the diamond trellis and planted our vines within the fall…

… and right here’s the way it regarded the next spring.

Burger positive did love botany. Look how impressed he was.

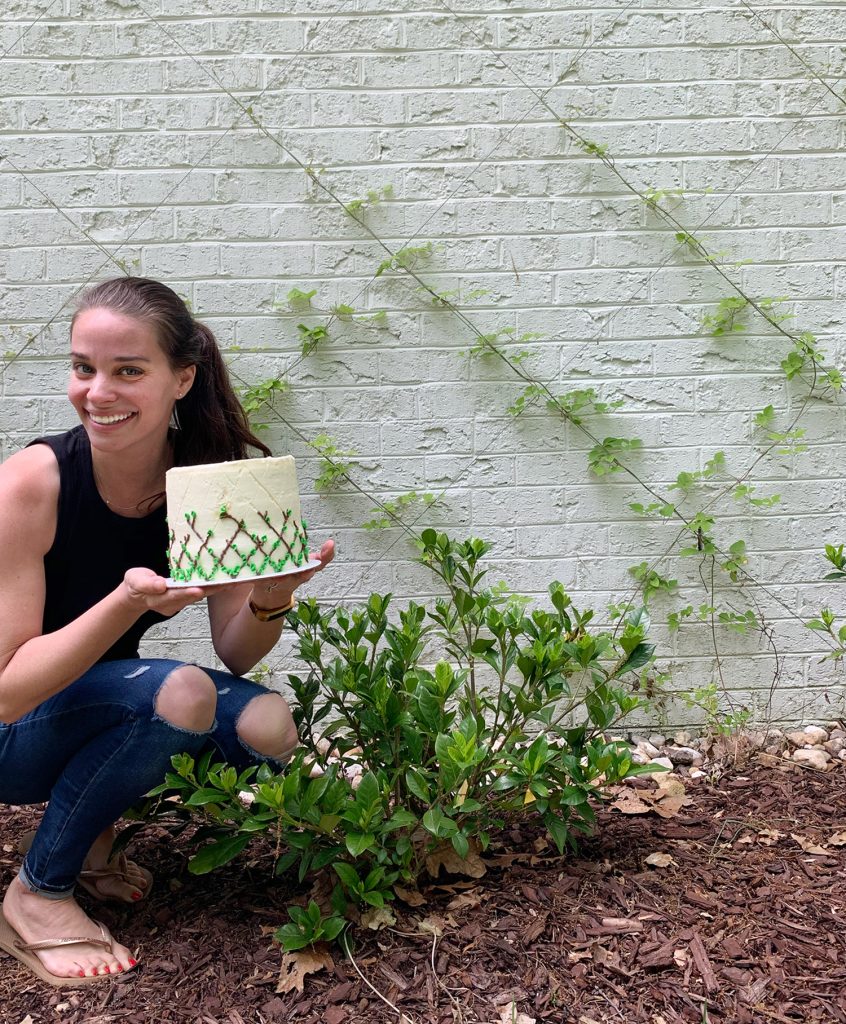
I really feel like this correct captures my enthusiams for this mission. Sure, my pal made this diamond trellis cake for my birthday (and it was gone in about 2.5 hours).

P.S. Need to see extra outside tasks we’ve tackled through the years? Right here’s a whole archive filled with them (from pea gravel patios & string lights & shed group to ornamental oars – ha! – it covers numerous floor).
*This publish comprises affiliate hyperlinks*


